
Layer-by Layer — Getting Started:
How to Talk to Your Kids About 3D Printing
It’s time for some education with Northwest Rapid! To help you introduce your children to 3D printing, here’s a helpful guide from our Engineer, Chantelle.
When it comes to many difficult parenting conversations, we can often draw on our personal experiences to frame the discussion. Drugs, well, it’s ok to admit it. We all experimented in college. “The Birds and the Bees?” If you’re a parent, odds are you have some knowledge on THAT subject. But 3D printing? Where does a parent go? What resources are trustworthy and accurate?
RE-lax! Auntie Chantelle is here to help you through this difficult conversation! My handy-dandy 3D Printing Primer will guide you with ease through this confusing and challenging tech in your child’s life.
First, let’s talk about the appropriate age to broach this subject. Of course, if your child comes to you with questions, consider an opening to address them. If they don’t, then I would suggest waiting until they are exposed to STEAM classes at school. You don’t want to push, but you don’t want your child left behind and possibly become the subject of ridicule by the children of professional nerds.
What IS 3D?
3D stands for the 3rd dimension. Generally speaking, it’s referred to as “depth.” Let’s look at a couple of shapes.


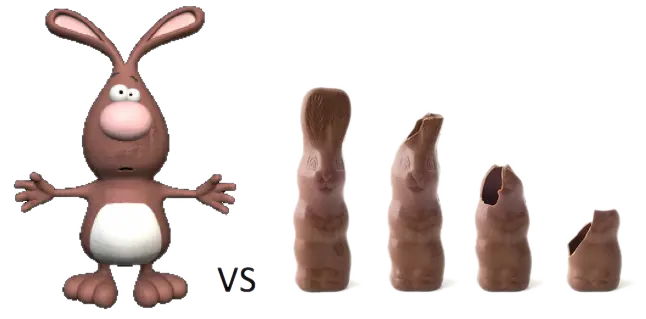
Thinking about it another way, it’s the difference between a painting of the Easter Bunny and a chocolate Easter Bunny. If you turn the painting over, you see the back of the canvas. If you turn over the chocolate Easter Bunny, you see his tail! And then you bite his ears off! Yum!
What IS 3D Printing, aka Additive Manufacturing?
To continue with the bunnies, let’s first contrast 2D printing with 3D printing. 2D printing would be used to create posters of our Easter Bunny painting. It’s a flat picture copy of the original, suitable for framing.
3D printing would require first making a 3D CAD file (more on that later) of our chocolate bunny, either by drawing it in a software program or by creating a 3D scan of the actual chocolate bunny. Secondly, the 3D file would be uploaded into the computer of a 3D printer. The file will be “sliced” into tiny, thin layers. The printer will then create those layers, one at a time, out of the material you have chosen (now there are chocolate 3D printers, by the way!) until the bunny is replicated
Time to NERD OUT!
Additive manufacturing is the process of making a three-dimensional solid object of virtually any shape from a digital model. Additive manufacturing is achieved through an additive process, where successive layers of material are deposited in different shapes. Additive manufacturing is also considered distinct from traditional machining techniques, which mostly rely on the removal of material by methods such as cutting or drilling (subtractive processes). Society of Manufacturing Engineers Definitions.
“How do I turn my idea/drawing/real world thingy into a 3D-printed object?”
Before we can make a 3D print of anything, we must have a computer-generated 3D model. When I use the word “model” here, I am talking about a computer file, not a physical object in the real world, like a model car or a statuesque blonde.
We must have data from all three dimensions to make the 3D object. That’s why the scan of the necklace in that heist movie was silly. How were they able to create the backside of the necklace without knowing what it looked like? Ah, Hollywood. But I digress. Not having all the dimensions to scan is why I can’t create a bunny with a tail from the painting of the bunny — there’s no tail in our painting. So, what do we do?
- We can use a computer program to draw all sides of the bunny. Then, we will have all the (data) information we need. Examples of computer software programs to make 3D drawings/models are:
- SolidWorks (our in-house software)
- TinkerCAD
- 3D Slash
- SketchUp
- Blender
There are many more out there, and a quick search (All3DP is a good place to start) should provide you with programs to research. I strongly recommend using a program that supports STL format, as this is the industry standard file format for 3D printing. You’ll see the term “CAD” a lot. That stands for “Computer Aided Design,” and that means that you used a computer to make the drawing/model instead of a pen and paper. It does NOT necessarily mean that the drawing or model is 3D, though. There are also 2D CAD drawings.
- If your object already exists in the real world (for example, the chocolate bunny), we can have a 3D scan made of it. Instead of trying to explain it here, Auntie Chantelle is going to defer to these experts who have been in the field for over 30 years.
Those are the two options currently available: Choice one or choice two.
“OK! I have my 3D model/drawing/CAD file. Now what?”
Now, we discuss what you want to make your object out of, which will likely dictate the type of printer you will use to create it.
“How will I know which material is right?”
What material to use? is one of those annoying questions that we must answer with another question: What are you going to do with this thing? Because that will most likely determine your material. Here’s a very basic flowchart to help you with choosing the right material for your 3D printing projects.
“I think I know which material. What’s the next step?”
Your decision on SLS material will guide you to the technology to use, i.e., which kind of 3D printer will be used to print your part. Most 3D printers use a specific material for printing. To keep it simple, I've created a table. I will focus on five of the most prevalent technologies currently available: binder jetting, material extrusion, material jetting, powder bed fusion, and vat photopolymerization. I will limit the materials to the six listed in the basic flowchart: Nylon 12, ABS, rubber-like, transparent, PLA, and gypsum.
The Technologies
What they are called in the marketplace, what they do, and which flowchart materials they use. We've put together a Technology & Material Chart to help you navigate the confusion with the different types of technologies.
Now, you should have a good idea of what kind of 3D Printer you want to use to make your part.
The next step is to find a service bureau that has the necessary technology to manufacture your part. Some quality, multi-tech providers are:
These providers offer online quote forms, allowing you to upload your file, select your material and quantity, and receive a quick quote.
Another option is to search for a provider that offers the material or technology you want. These may be smaller service bureaus that can provide you with more customer service (like pre-print file review, material suggestions, etc.) but may cost slightly more.
Choose your service bureau!
Once you have a provider you want to work with, warm up your credit card, place your order, and sit back while some amazing technology and helpful professionals manufacture your part!
“Anything I should watch out for?”
As an industry “insider,” there are a few tips that I would like to impart.
- Determine where the printing is taking place. There are brokers out there that have machines in-house but may have things (or some things) made elsewhere. It’s a fairly common practice, and there’s nothing wrong with it, but it may increase your cost to use this “middleman.”
- Get more than one quote. A service bureau’s price varies widely. Try some big and some small bureaus.
- Read the Terms and Conditions of Sale! Few large bureaus will review your file for errors or printability, but most bureaus (large and small) will state that they “Print to File,” meaning they print what you send them, and if it’s messed up and doesn’t print correctly, that’s your responsibility, and you bought it either way.
- Bear in mind returns are generally not offered. You can expect reprints only if the bureau’s machine malfunctions. Remember, you are asking for a custom, one-of-a-kind object. Returns are rarely a thing.
- Dream big but be practical. 3D printing isn’t magic, and you can’t make anything and everything. Be open to suggestions if a 3D professional offers to help you achieve a better end result.
Ultimately, the key takeaway is that your child’s curiosity about 3D printing is perfectly natural. Whether they decide to engage in 3D printing behavior — and whether you permit it — should be a personal choice. I hope that my handy 3D Printing Primer will provide you with a solid foundation from which to guide these critical life decisions. Don’t hesitate to reach out if you need further support or have questions that I haven’t addressed here.
With love,
Auntie Chantelle
For more information, please don't hesitate to contact us at or request a quote and upload your file today!